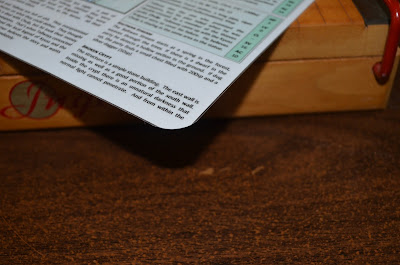
First off, you gotta write something that fits on a single notecard or page. Most of my micro-adventures fit on a 4" x 6" notecard or a 5.5" x 8" half sheet.
This is the typical size, 4" x 6" notecard. I hand draw the colored maps. It's two-sided. To add some color I use a color coded fill in my text boxes. I've got a new color coded thing going on. Brown for monsters/critters, yellow of magic items and green for NPCs.
And of course in this example I break my color coded thing and the creatures are blue. This is how I do the half pages. I get two out of each sheet. I always use 65lb cardstock for these. I haven't experiment using a regular sheet of paper because I prefer the look and feel of the cardstock. The extra weight makes it more substantial.
Now to the lamination part.
Meet my lamination crew. I have a Swingline GBC Laminator Ispire. It has a 9 inch max width. I originally got it for $19.92 at Christmas in 2013 and it is now $49.98. Holy crap. I give this machine a good rating. It does a good job, it's small and heats up quick.
The lamination pouches come in various sizes and places. I was buying them from Staples then found out I could get them much cheaper on Amazon. The full sheet lamination pouches are from Trulam 9" x 11.5", I get 100 of them in a box for $11.96. The smaller ones are Universal Clear Laminating Pouches 4 3/8" x 6.5" and I get a 100 in a box for $11.54. I like these pouches because they are open on the long side so it make it easier to position the adventure straight within the pouch. If you have the option, get the those that open on the side.
After you get your adventure positioned correctly within the pouch, send them through your laminator. But do NOT walk away. When they go through the machine make sure you are supporting the adventure as it comes out. If you don't, it will bend. There is an inch of difference between where it comes out from the table. Yes the plastic will be kinda hot, but suck it up cupcake, no one said laminating was easy.
As soon as it comes out, immediately smooth it out on the table. The plastic cools down quickly so you only have a second or two to do this. This way you get the flattest version. There still may be some arching to it, but I advise not putting it through the machine again. It weakens the plastic and it never seemed to help with the arch.
A tip on using one of these things. Don't be gentle. You need to cut with authority. If you try to gently drop the guillotine you're are going to screw up your cut. Line it up then CHOP! This is where making sure you line up you adventure straight in the pouch becomes critical. You want as clean as line as possible.
Here is the half sheet micro-adventure trimmed. The good thing about the laminating process is even if you cut into the paper the seal remains. Someone really needs to pick at for it to separate. So with the half sheet adventure I put two on a page and then I lop it in half right down the middle. The ruler guide on the guillotine is perfect for getting the right cut.
Wa-la. Two micro-adventures ready to go. Oh wait...no they are not.
They have these sharp corners that can puncture a cat's eyeball. While I don't mind a little intraocular fluid on my adventure I try to keep it clean. It is the privilege of the patron to decorate the adventure with the body fluid of their choice.
To combat the jabbies I bought Crop-A-Dile Corner Chomper. I originally bought it for zine projects, but found it to be exceptionally useful in my micro-adventure production. I bought mine at Jo-Ann Fabrics, I can't remember how much I paid for it. On Amazon it's going for $20.07. Weird price. This one can round your corners in two sizes, a 1/2" corner or a 1/4" corner.
This is the 1/4" cut that I now prefer. I like the look of it better.
This is what the 1/2" cut looks like. Still nice looking, but I prefer it more on bigger projects like a zines.
And the micro-adventure is ready to ship out to patrons. It is a fun process, takes time though. Not counting the writing or layout, purely the production with the printing, laminating, trimming and cropping it takes a good chunk of time. I would say about 3 to 4 hours a batch. That is only a guess. Haven't timed myself yet and I'm sure there are Netflix distractions that one would need to consider.
I wanted to share the process of making my micro-adventures. If you have any question please let me know. I will answer them to the best of my ability. I learn new stuff all the time and I'm always looking for different ways to improve.
I'm always looking for more patrons to join my micro-adventures campaign. The PDFs are free for everyone to download. And most of the time I include separate files for a GM map and a players map. Those that pledge $2.50 get all the 4" x 6" and half sheet laminated micro-adventures. Those that pledge at $5 get the previously mentioned adventures and the zine sized adventures. Also they receive discounts or freebies for other PDF products I release.
Thanks for those supporting my micro-adventures. I've reached 61 patrons and a little over $140 per adventure. I've gotten great feedback and ideas from my patrons. I really enjoy this format. They are fun to make and run.


No comments:
Post a Comment